Our Fair Country (and a big announcement)

Our Fair Country (and a big announcement)
I'm heading to NYC for the National Stationery Show. When I return I will be throwing myself fully into making Worker Bird a real, real thing. I am excited and inspired to take this leap. There will be more of these maps and all 50 states and much more coming this year. Onward.
The Longest Bathroom Renovation Ever
We must be able to claim this title. When - in the history of the universe - has an 8'x10' space taken almost two years to demo and rebuild? I think never. Oh, and we're not actually done two years in. Best not to think about that right now. We're done enough to make it work.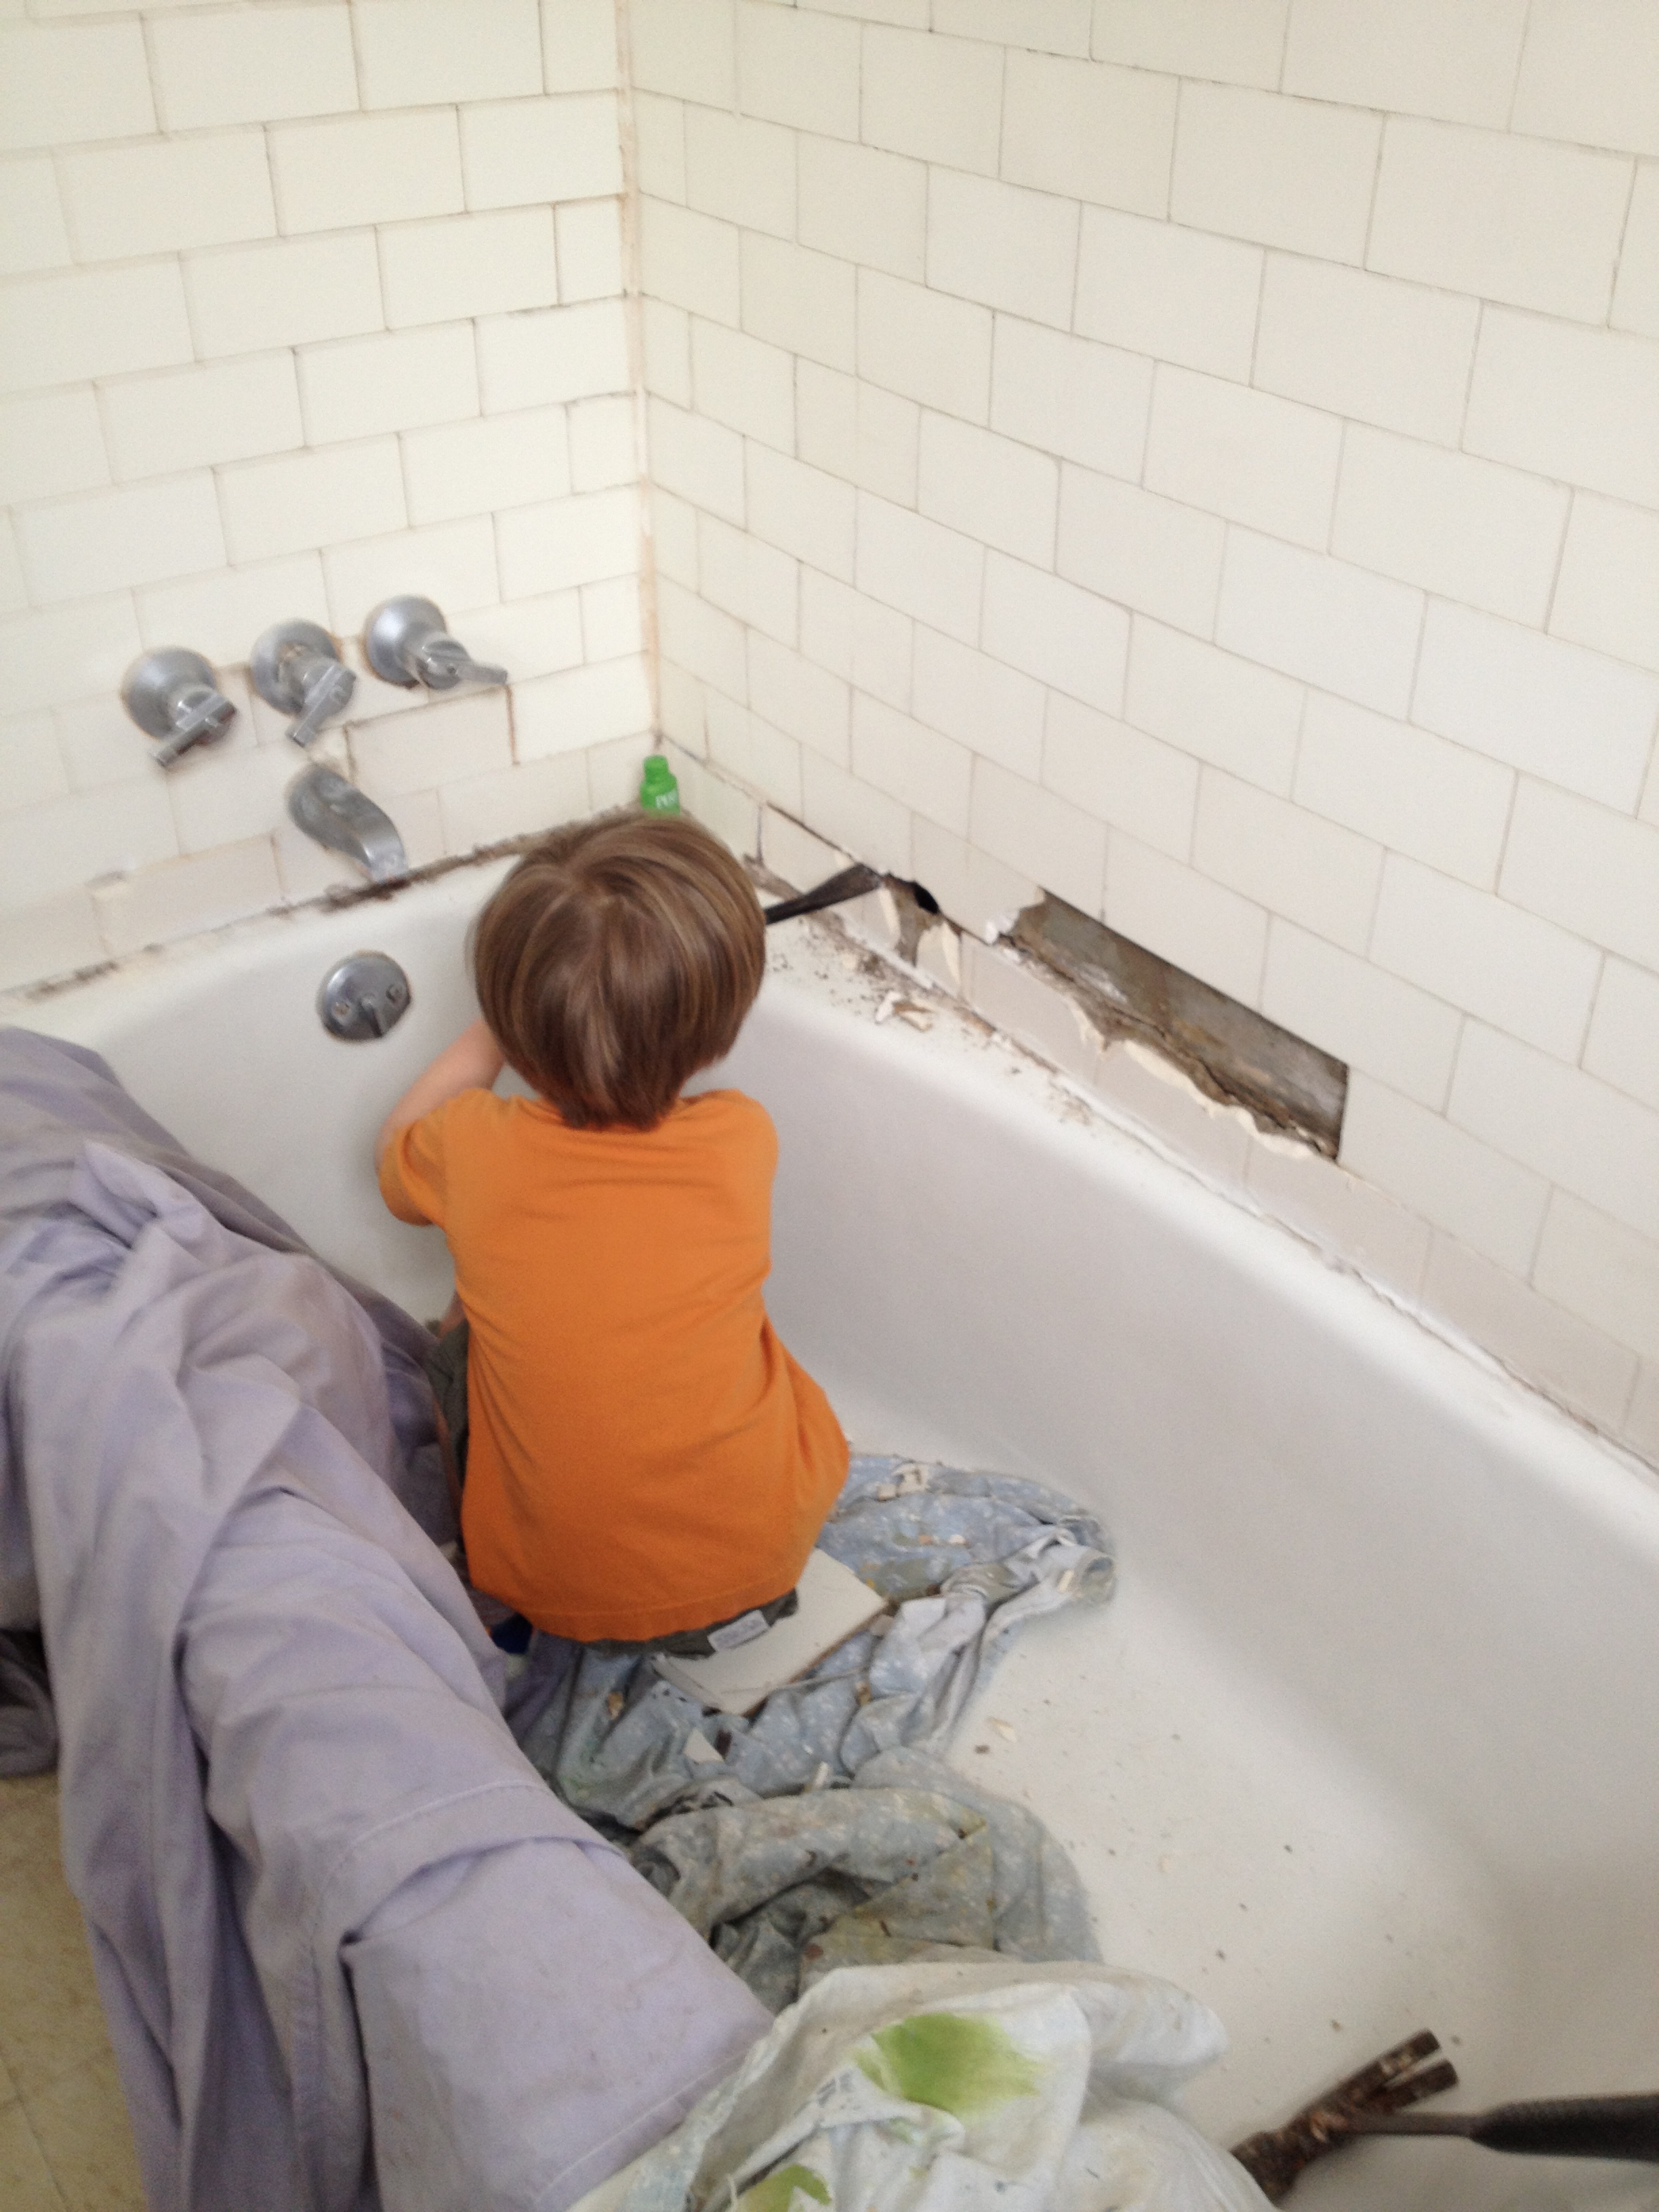 It began after football season ended in 2012. There wasn't much else to do on cold, Sunday afternoons so it was a perfect time to start demo.*Please note: in any applicable instance we tried to salvage as much as possible. The tile that we could save went to a friend who collects vintage tile. The crazy wall-mounted toilet (see below) went to a man in FLORIDA whose father started a plumbing company here in Pittsburgh and he wanted to display it in his shop down there. The fixtures that we didn't want to reuse went on Craigslist for new homes. I hate to waste ESPECIALLY cool, old stuff.*
  Yum. Asbestos tile.
  Here is the super great toilet that moved to Florida. The coolest part about it is that Pittsburgh went through a period where it was robbed of its final "h" (in 1891) but Pittsburghers don't like change that's forced upon them and lobbied - successfully - to get its H back (in 1911). So this toilet is from the period when it didn't have its H. So it's oooooold.
 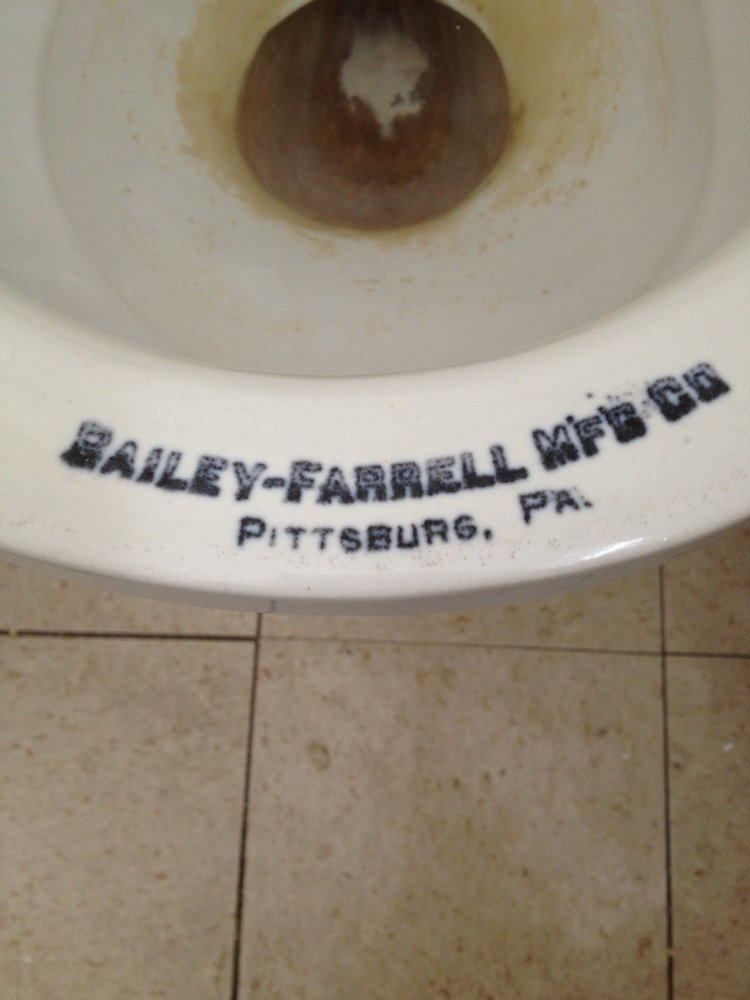 No "h"
  This kid is becoming so pro. I joke that when he grows up he's going to buy a new-construction condo in a hot climate to get back at us for living in a cold place and constantly renovating houses.In the background you can see a bit of what went on here. We had a bathroom next to a huge closet that was too little to be a room and too large to remain a closet. So we took out most of the wall between the two spaces in order to reconfigure the floor plan and build an alcove for the new tub. See below for da Vinci-like rendering:
 Boom.
Boom. 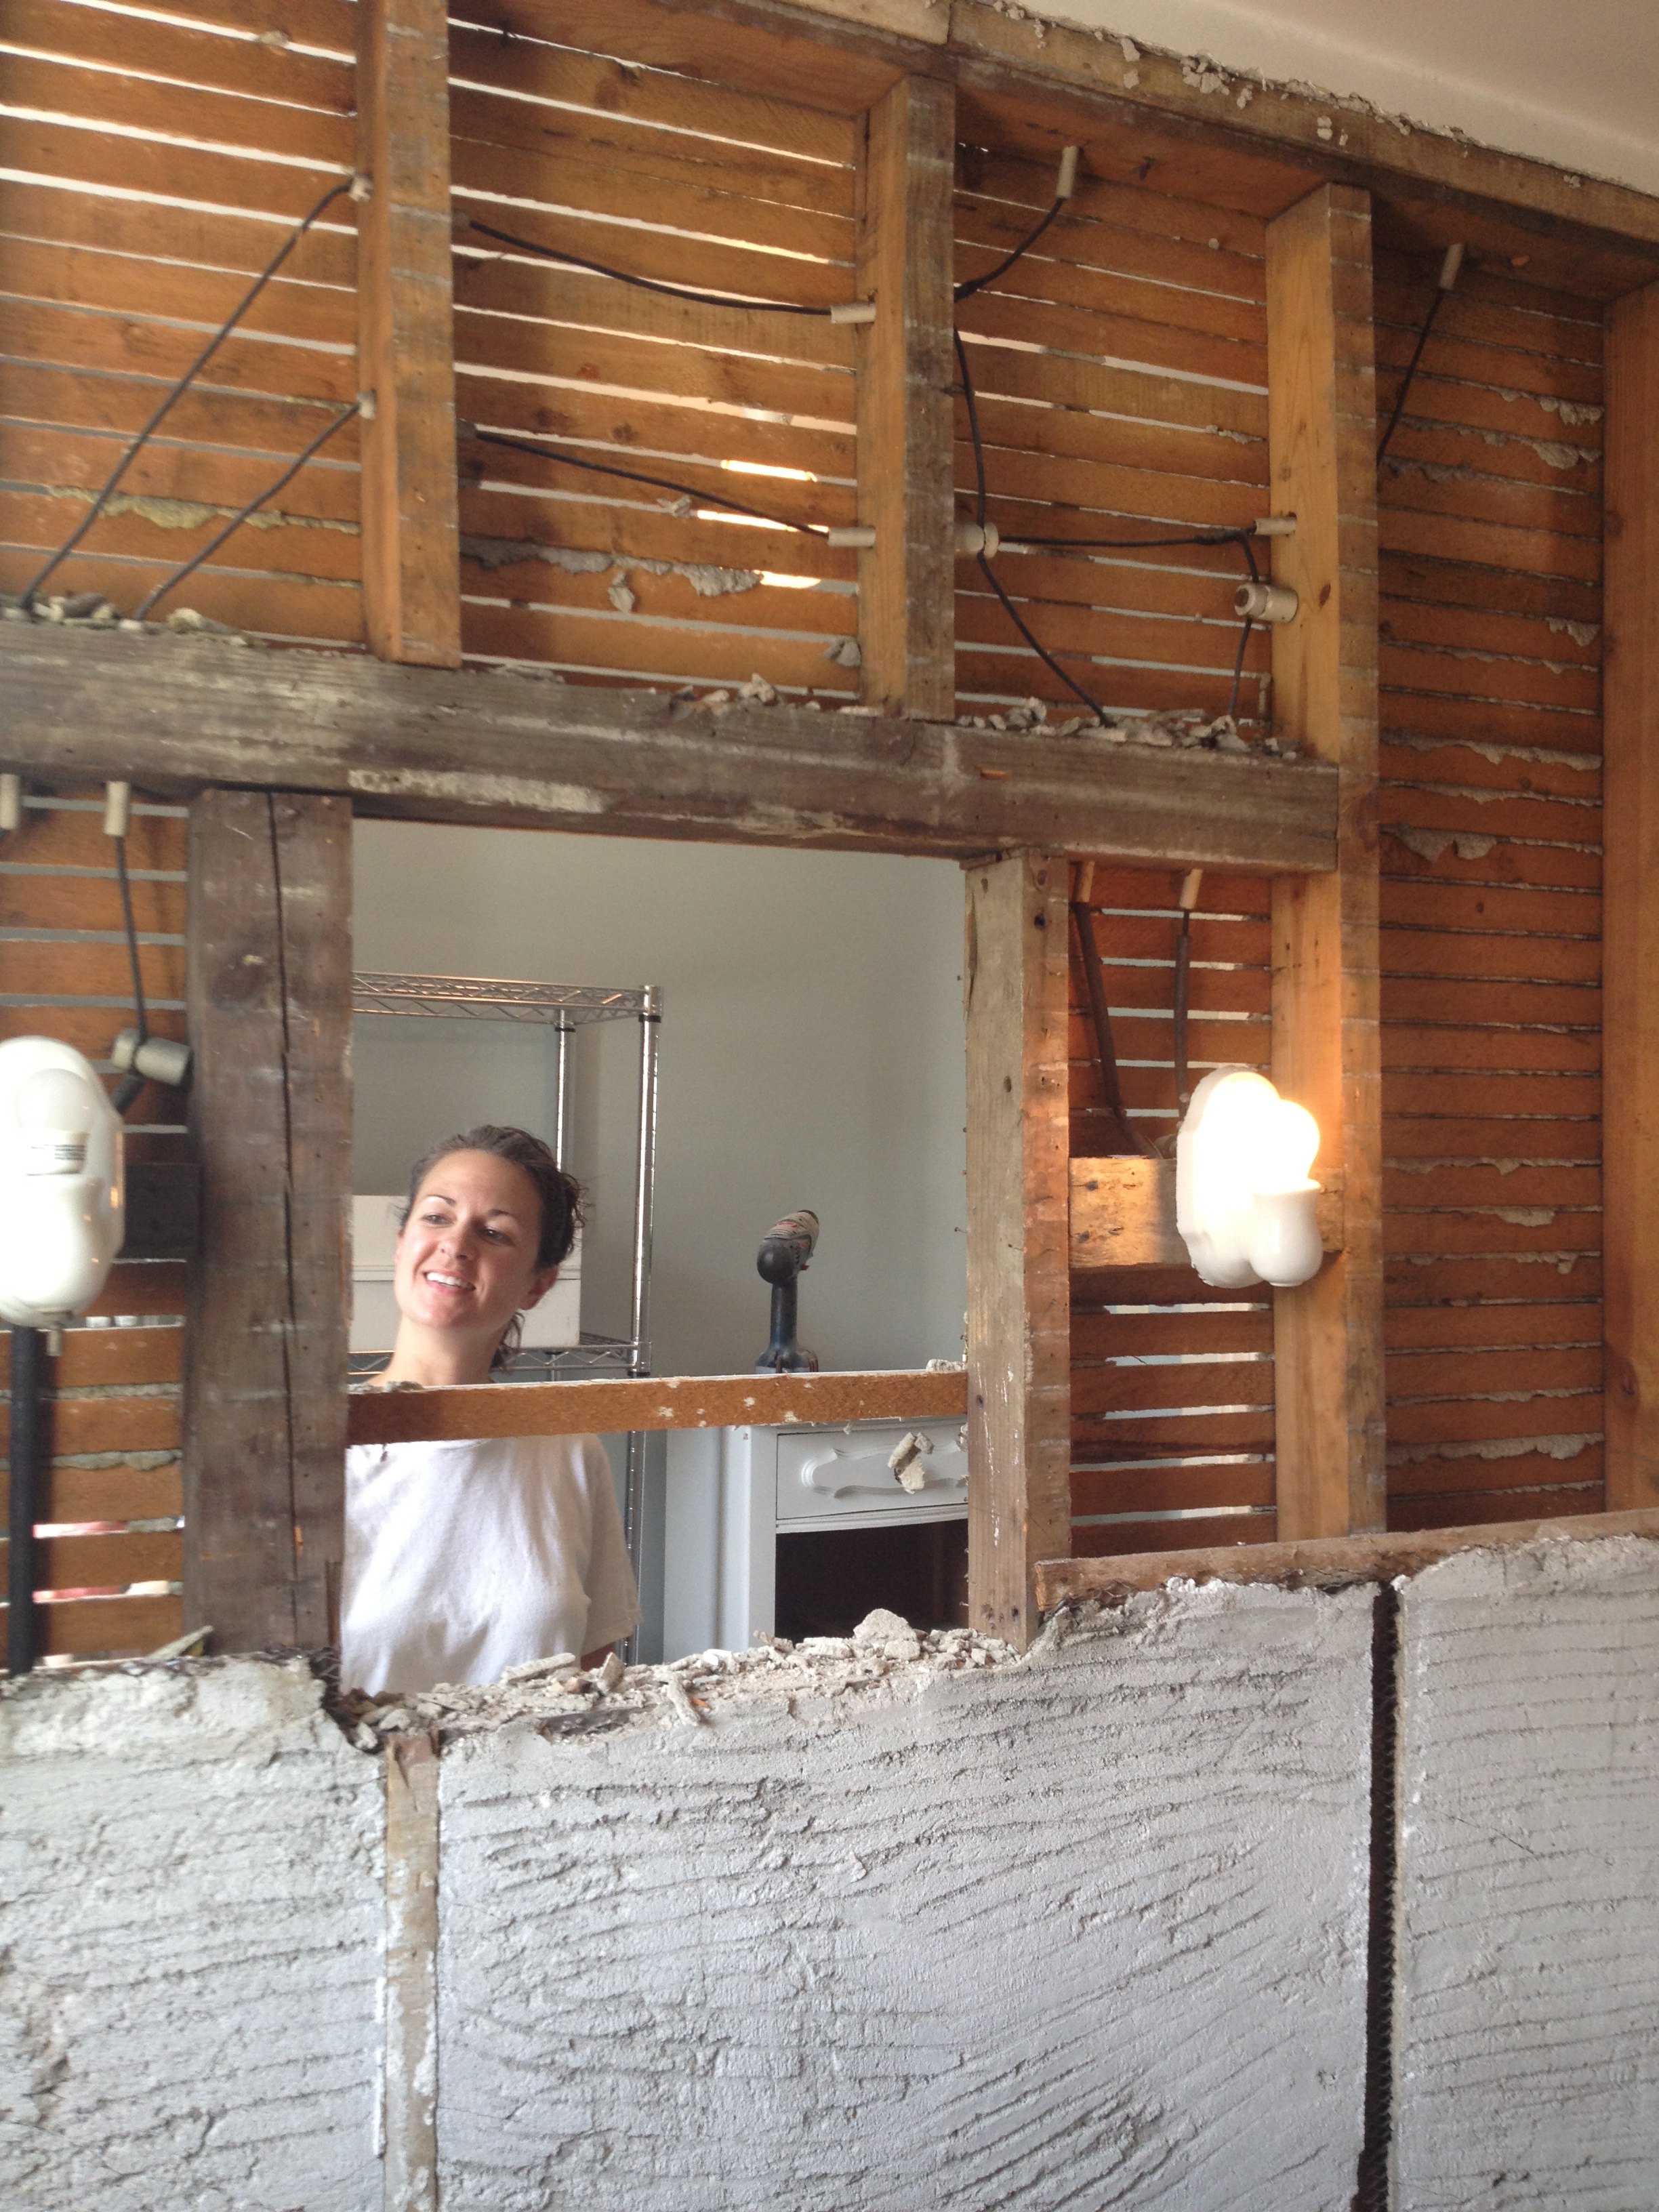 Do you wonder what your walls look like under that plaster? This. That is my wonderful friend who spent a weekend with us JUST TO DEMO.The craziest thing that happened during demo was this: do you see those charming little light fixtures on either side of the opening where the medicine cabinet used to live? Shortly after this picture was taken Steve shut off the power and disconnected the first light (I think it was the one on the left). As he pulled out the set screw that held the light to the wall a fizzing sound and natural gas smell took over the room. The light was still attached to a LIVE gas line from 76 million years ago when these homes used gas-powered lights.Cue call to the Columbia Gas 24hr Emergency Line. Nice guy comes out and kills the line. We counted our lucky stars and got back to demo.
 This is about when it got real sexy. This is the area under the old tub.
 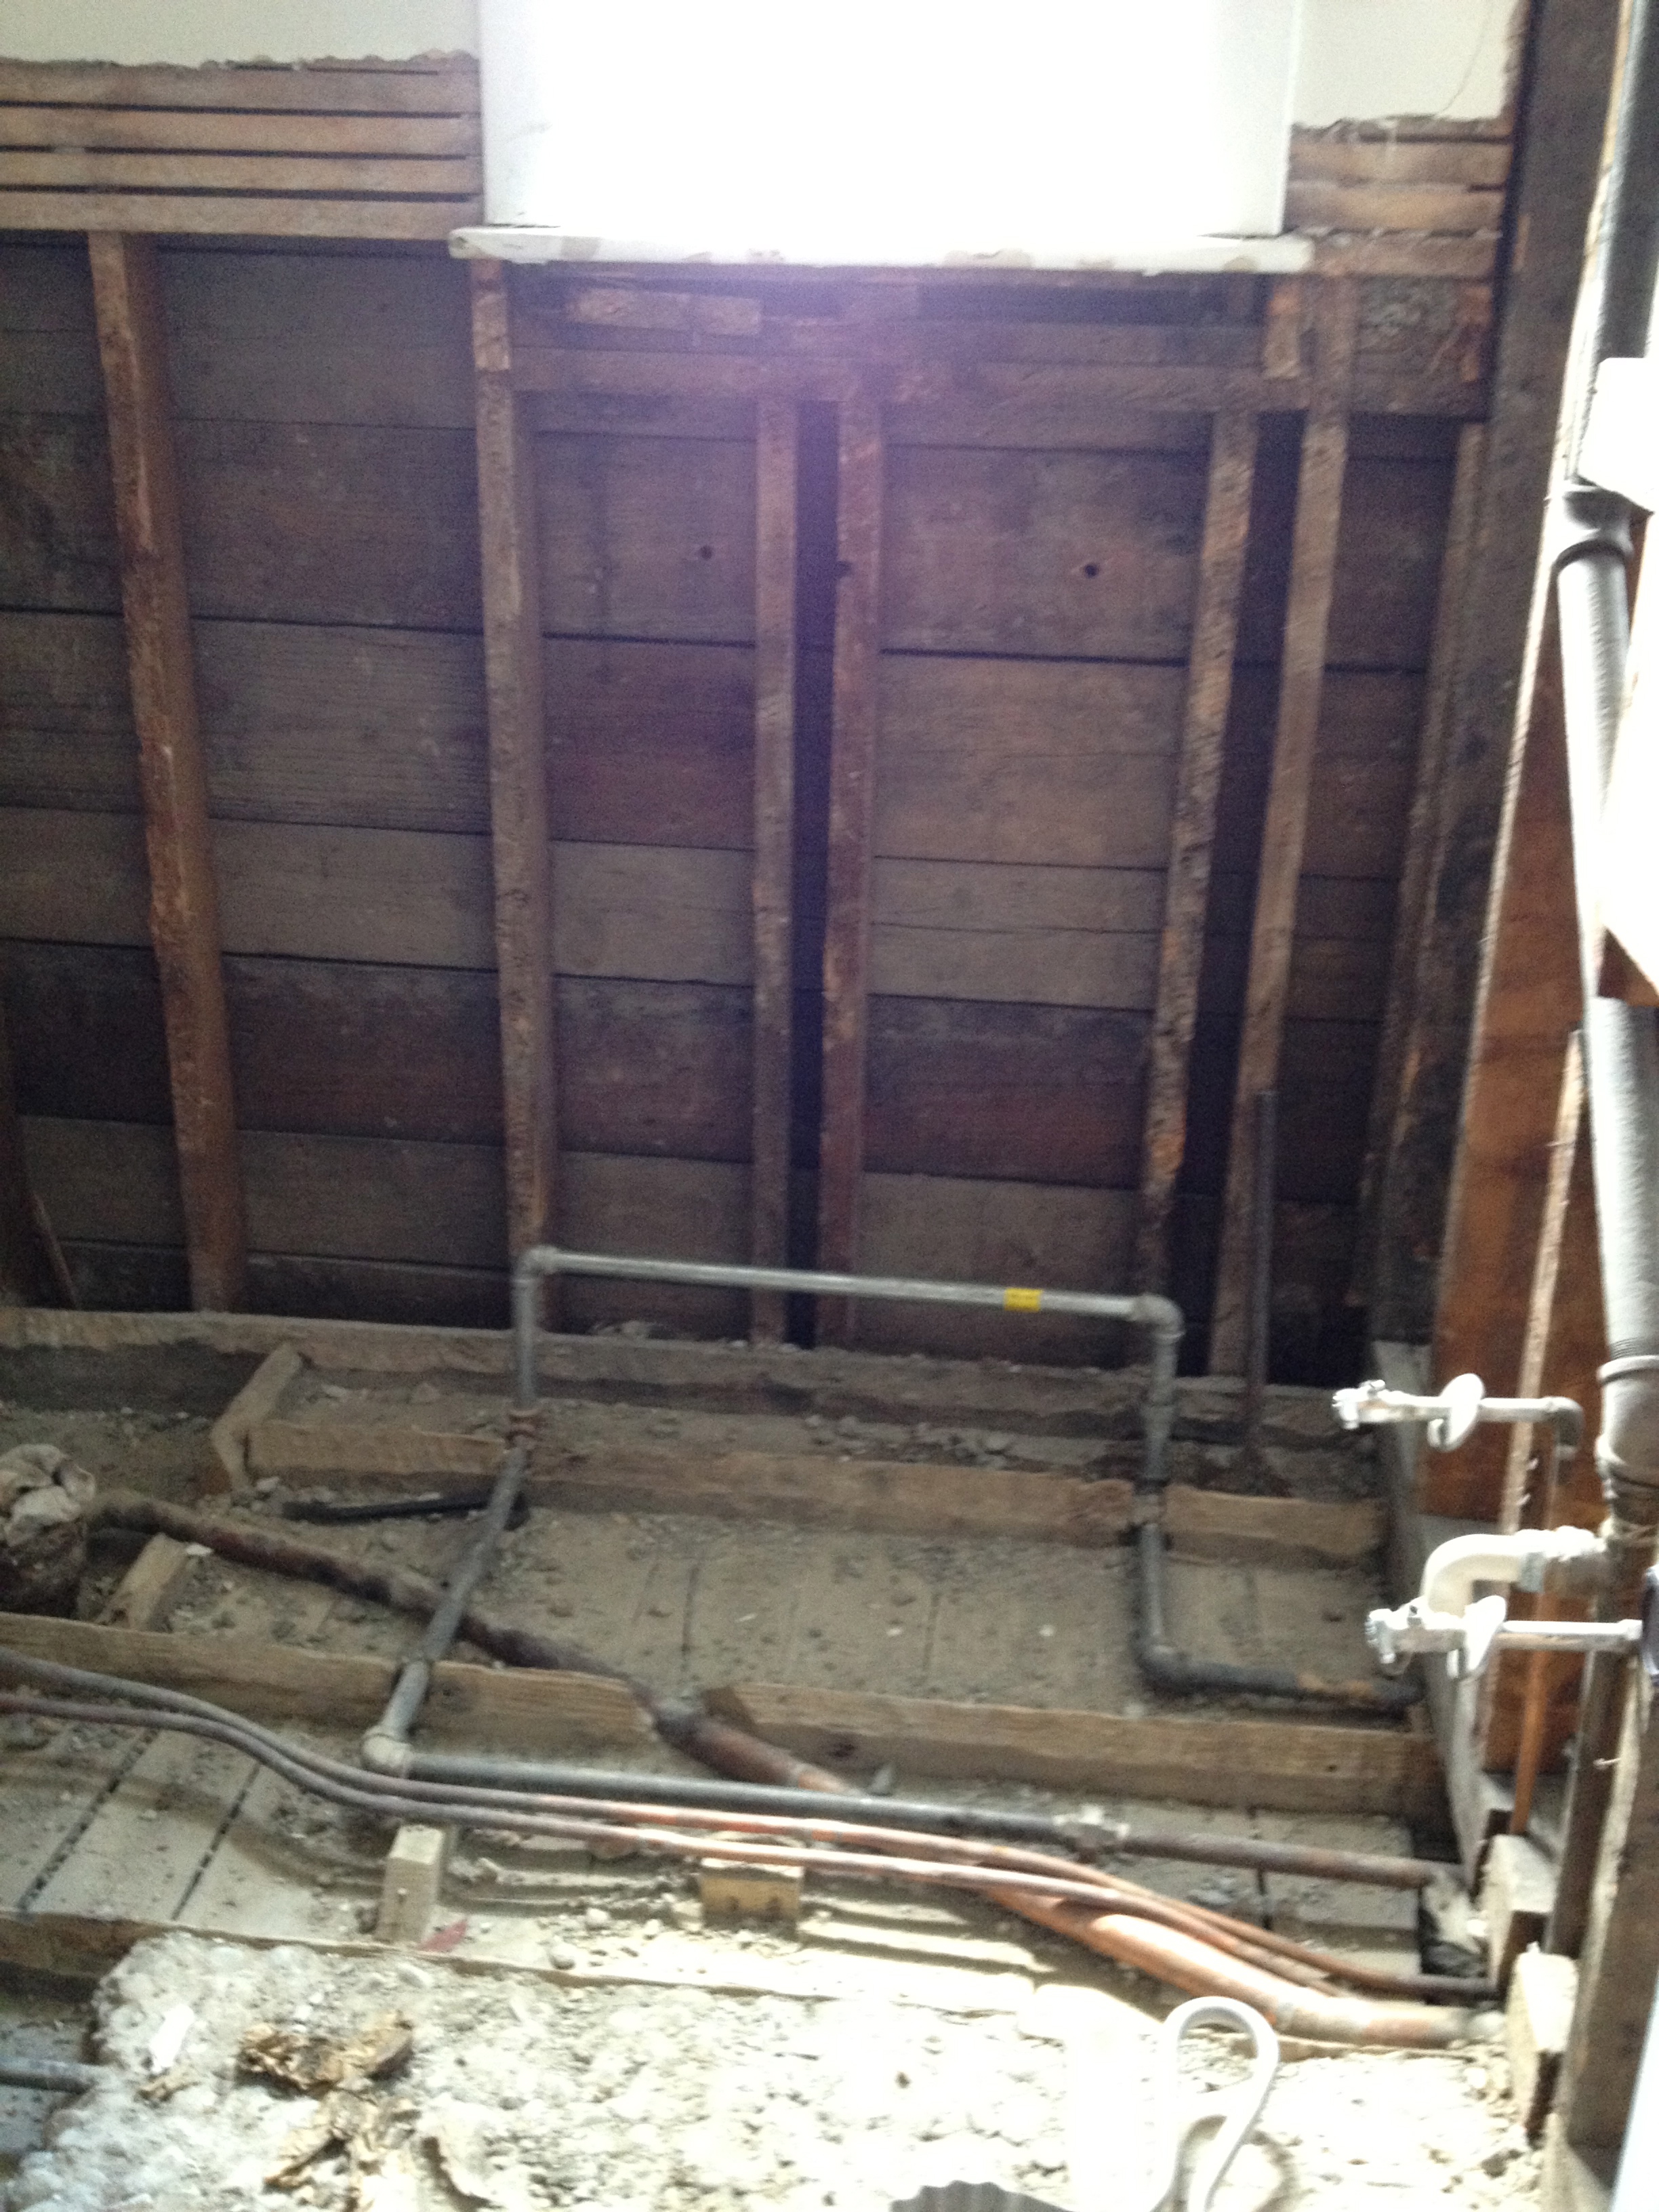 At this point we had everything pretty much out. We had to break up the solid concrete floor that was under most of the floor. After this was removed the wall between the bath and closet and then our contractor started putting it all back together.
  I want to learn to drywall. Sometime.
  This is one of my favorite parts of the new room. We salvaged all of the lathe that was behind the plaster. Steve designed this wall-o-lathe and we cut and sanded everything to create the wainscoting. It's gorgeous.The floor tile is 6" slate that I love and is easy to work with and budget-friendly.The medicine cabinet is the original one which I started to strip except I got it to this layer and loved it. Sanded, sealed and done.The light fixtures came from an odd shop in Lititz, PA. We have a few other light fixtures from them in other parts of the house.
  Here is where we are today. The sink was a Craigslist find which I had powder-coated to match a Pantone swatch. The toilet was upgraded to one that doesn't use 84 gallons of water per flush. The "vanity" is a table that I have carted around since I lived in Charleston, SC in 1996. The antique dental molds also traveled with me from Charleston where I found them in an abandoned building. Lastly the poster is by Paul Mastriani at Lure Design.What remains? We need to paint the trim, put window film on the little window in the tub/shower and put a threshold down in the main doorway. I've given us one more year to finish.
Great big ol' USA - process


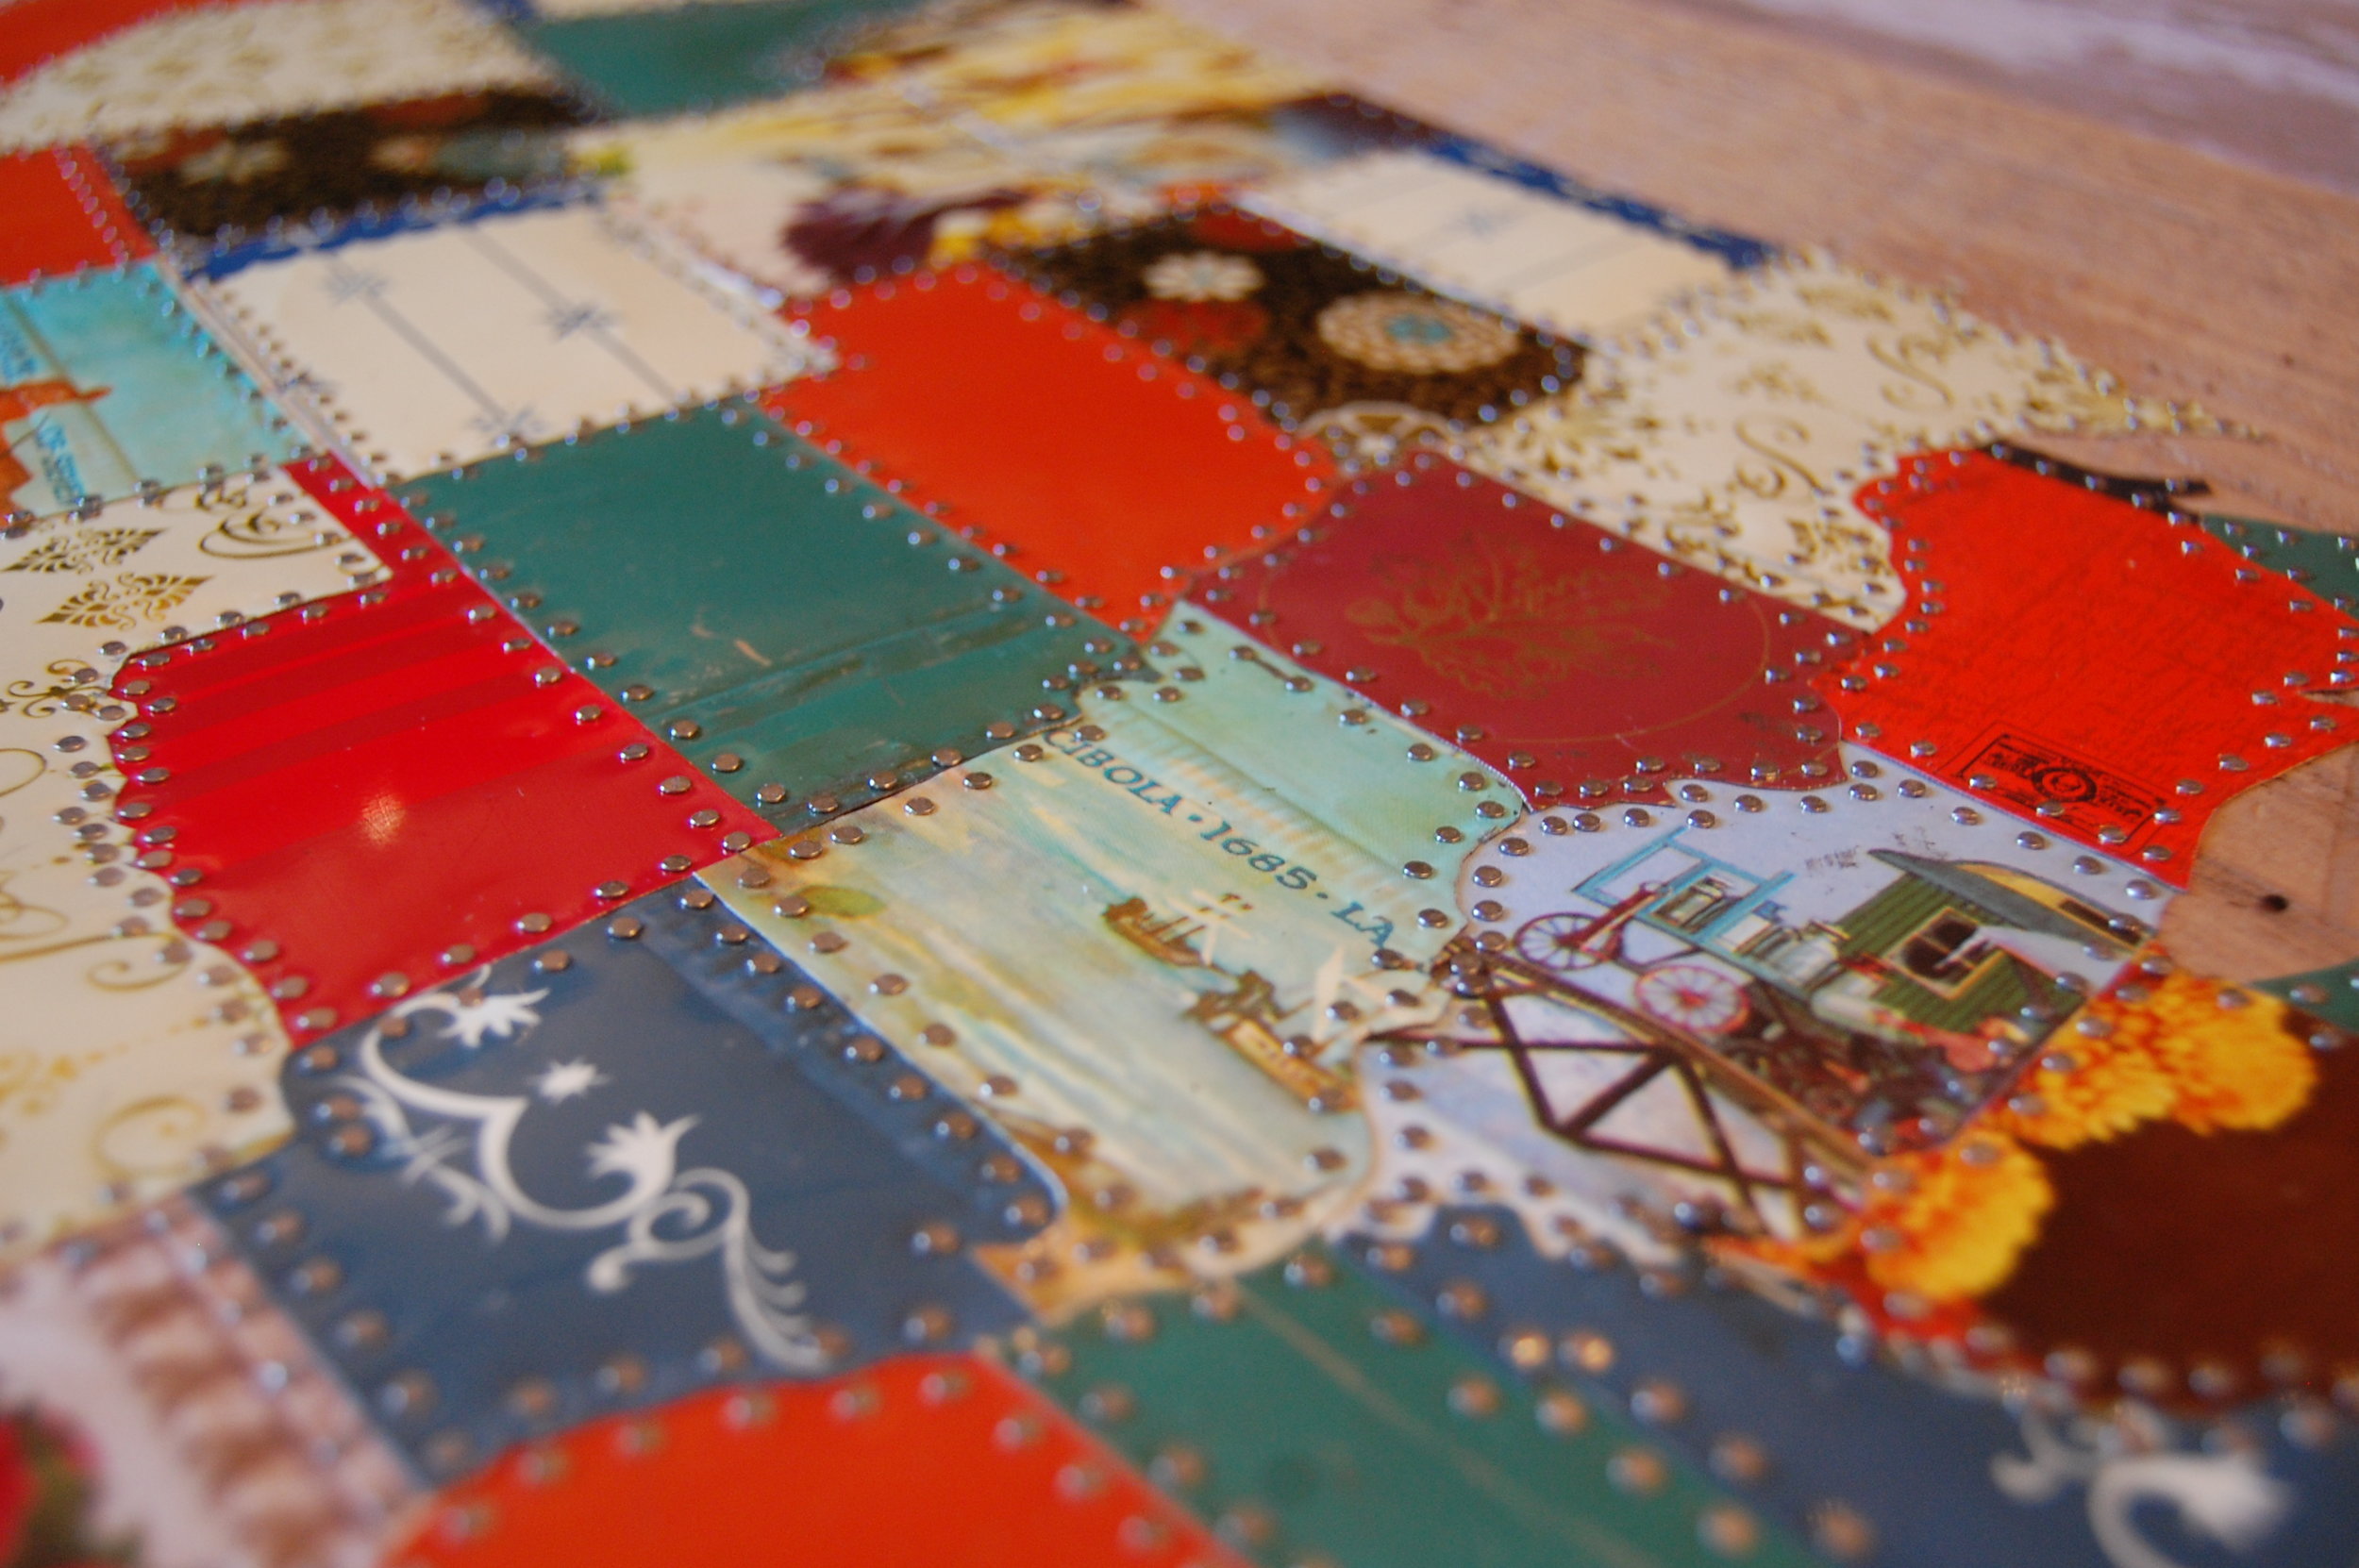

My husband inspired me to do something big with the tin art I've been making so I used the Our Fair States idea and went 48 times bigger - I made a map of the contiguous states. It's about 26" wide and 20" tall on two pieces of wormy chestnut. I started by printing out a map of the states. Then I traced and cut out each state separately. I then cut each state out of my stock of biscuit tins. I got lucky with some (NC and VA for example) and others were chosen simply for color or pattern. I began assembling at Washington state, moved down and across, down to FL and upwards to New England, tacking and cutting and placing as I went. After every state was tacked well into place I filled up a barrel of wine and set myself up for hours of tacking in hundreds of tiny nails (I use 19 gauge, 1/2" nails for anyone that's interested). When that was done I had a hot soak in epsom salts and slept like a baby. And dreamt of putting nails into metal. ("What could that MEAN?") I will have the piece on display TOMORROW at Handmade Arcade along with a batch of new tin pieces for the holidays. I will have some new 2C prints and my wooden panel pieces, as well. AND tasty Peppermint Bark to give away with purchases. If you brave the wintry weather that is predicted please stop by my booth and say hey. Onward.
Put me to work
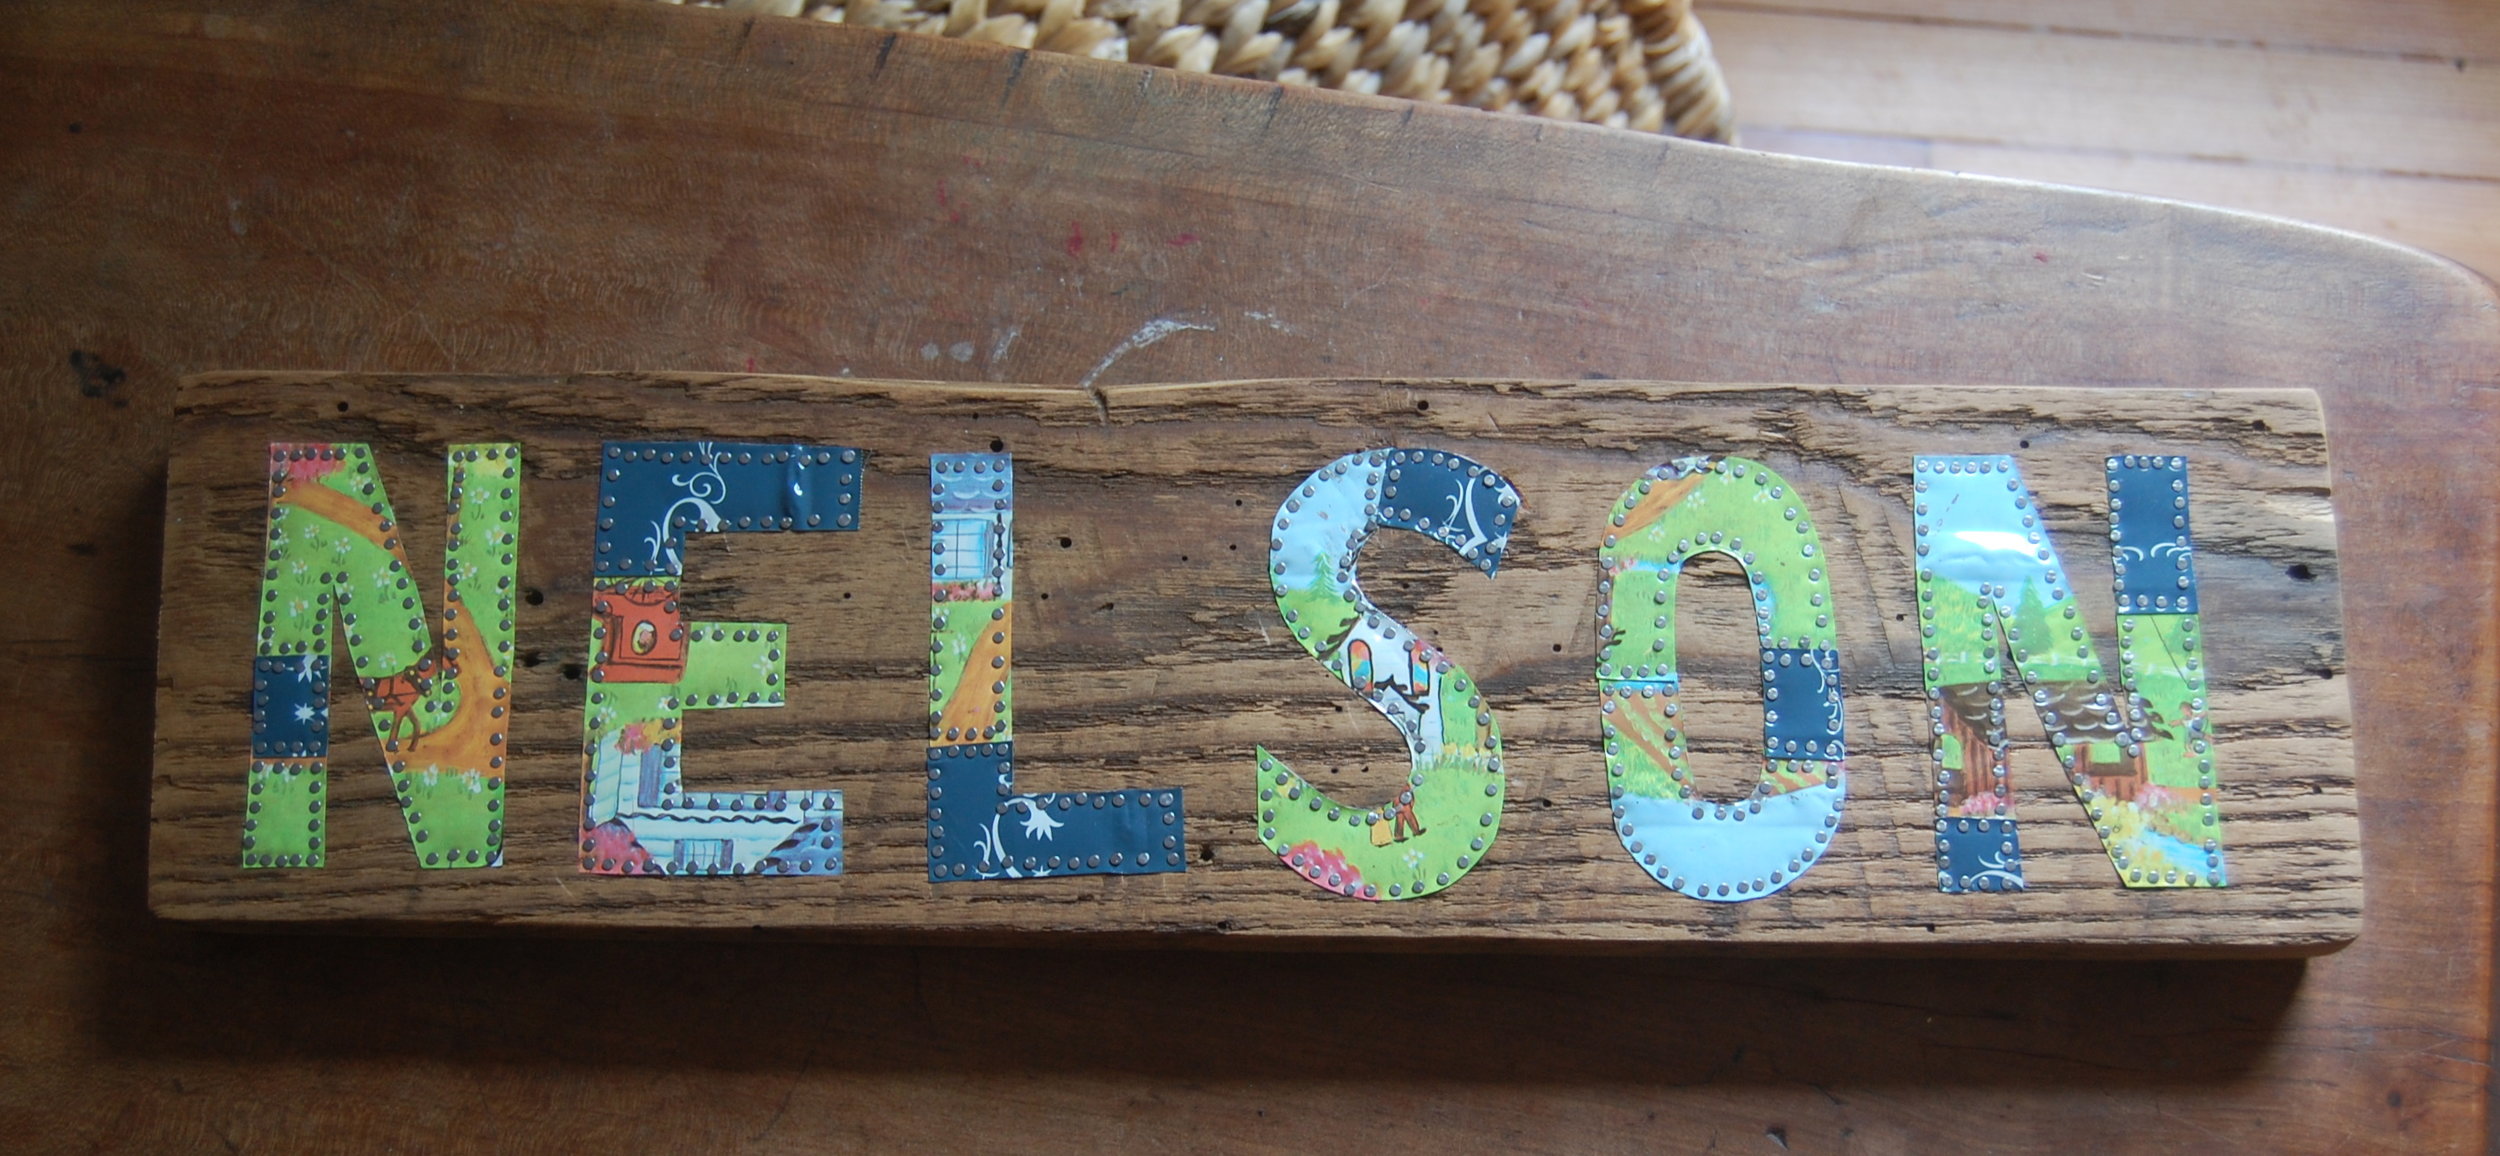
This sign is DONE and in the post - heading to Charlottesville, VA. I am beyond thrilled that I'm getting orders for these signs. My sweet husband found a huge batch of wormy chestnut boards on craigslist for me so I'm set for many, many more signs. Next up, one for an unbelievably wonderful home here in Pittsburgh and then one for my sweet soon-to-be-born nephew and then one for the farm where I work. And then...? Maybe you know someone who needs a handmade sign fashioned from reclaimed wood and vintage biscuit tins? If so, send them my way. Much obliged.
Big doings around the Foxbury Farm

DSC_0001
Just in time for Spring everything is new around here now. The biggest of the big doings is that my wonderful husband took the leap into working and living the way he (WE) wants to. Yesterday was his first official day as the Big Boss Man at Yellow Couch Studio. This means so much to us - more time together and more time as a family, flexibility with our time and our days, space and time to explore new ideas and projects. It's all so wonderful. I am so proud of him and excited to see what our future brings. I'll have a couple of full days a week to work myself which will be the first time since 2006 that I've been able to dedicate big, fat blocks of time to my pursuits. (Watch out, pursuits!) I'm starting my new work life by putting a bunch of new work up in my Etsy Shop. ONWARD.
Kitchen Fixture
 THIS lovely thing was made by my husband. The lights are reproduction trouble lights from the Anthropologie Sale Room and the box is constructed of lath from our recent bathroom demolition. I love it for a lot of reasons but one of the best things is the cool shadow is casts across the room.
Christmas Bird Count 2012
Yesterday I took part in the Annual Christmas Bird Count. After Friday's horrible events I especially needed and wanted a respite from my thoughts. Roaming the woods and solely focusing on one thing - flitting birds - was just what I needed. I joined Jim and Pam and tromped through four parks in our little town and this is what we saw, in no particular order:Carolina ChickadeeTufted TitmouseCardinalRobinCrowWhite-breasted nuthatchSong SparrowWhite-throated sparrowNorthern MockingbirdRuby-crowned KingletGreat Horned Owl (heard)Carolina WrenHouse FinchGoldfinchCooper's HawkMourning DoveRed-tailed hawkDowny woodpeckerHairy woodpeckerYellow-bellied sapsuckerBlue jayRed-bellied woodpeckerParks roamed: Bird Park, Twin Hills, Robb Hollow, Connor Conservation Area
Before + After House (a million years later)
Contrary to what this blog would make you think about our lack of progress on the house we have been working like crazy. Our recent big project was a hen house for our girls, Chunky Penny, Lady Whistle and Ms Jackson. Naturally before building a hen house we thought we should go ahead and tear out the non-retaining retaining wall that the previous owners "built" out of broken bricks and concrete blocks. Here's a quick BEFORE shot to make you see just how heavenly our back yard looked when we moved in:
 FULL DISCLOSURE: the yard didn't look this nice when we moved in. I took this the morning we started the new retaining wall which was just a couple of months ago. Since we moved in we added the butterfly bush and the rain barrel that will eventually catch the run off from the garage.Anyhow - after a day of building the wall and learning that our next-door neighbors are really amazing, wonderful and generous (even moreso than we previously suspected) this is what we had to look at:
 The next step was to build the hen house. Little Brother Anthony arrived (in jorts) to aid in the construction.
 We made a ton of progress that weekend and then promptly walked away from the project for awhile due to work, travel, etc. You can see by the change in attire and the leaves on the trees how much time passed.
 TIME WARP:
 This is much nicer to look at, no?
 Now the girls live out there as happy as can be. I love to look it every day as more leaves fall and it settles in to look like part of the landscape.This project would not have been possible without the help of friends and family who donated time, supplies and food. I feel like I'm dedicating a book. Huge thanks go out to Anthony for jumping in and getting us moving on the construction; to Sierra and Tommy for helping to engineer and build the wall; to Ton and Sonja for lunch, tea service, gravel and dirt moving and all around moral support (and for giving birth to Sierra all those years ago); to Tammy, Barbara, John, Eric and Jan - neighbors who donated scrap lumber, chicken wire, shovels, etc.; to Dad, Kate L, Terry, Natalie, Cliff M and Janice D for donating license plates; to Mom for hanging out with Whistle and most of all, to Steve, who continues to indulge every crazy whim I get.I am so happy to have built something for the hens to live in that makes our home a more interesting, fun place to live, with the generosity and kindness of so many people involved. My heart swells.
Before and During
You may remember that when we bought our house it had two kitchens. "Ooh la la" you might say. You would be wrong. Both were/are totally gross (but workable). The upstairs kitchen is now well on it's way to being a super awesome big-boy room for Whistle. I'm too busy getting ready for my show next week to go into much detail but here are some pictures of the before and during. The after will have to come later. Kitchen: before. To me this was the cutest room in the whole house when we bought it. But we didn't actually need two kitchens, let alone one on the second floor.
 These cabinets/counters/sink caused a small bidding war on Craigslist. Believe it.
 Steve took up the vinyl flooring and we had the floors redone and the plaster walls/ceiling repaired. The former owners used 3" nails for every home "improvement" project so when we removed the cabinets we destroyed the walls.
 View where the cabinets used to be. Steve cut new baseboards and put down new 1/4 round in the room. The after pictures will show that.Now, back to work for me.